Setting up the Module
How to setup the Mashoom Design module
Contents
This module aims to provide a framework for a team to work within to keep themselves organized. This is achieved by making a small but powerful set of configurations available so that Mashoom can adapt to different or existing workflows whilst still providing the correct restrictions.
There are two main parts to setting up a design module, the file types you would like to accept as "design files" and the part numbering scheme you will use.
To see how to setup a team, where this module can be enabled, Settings up a team tutorial.
File Types
In the design module, a distinction is made between "design files" and all other files that can be uploaded to a design item. These "design files" are CAD files or static drawings; they are files that are going to be controlled and part numbered. In order to make this distinction as well as providing some common sense file type enforcement, the file extensions that apply to each type of file must be specified.

A quick selection for some major CAD providers has been provided; clicking one of the buttons fills in the appropriate fields with the packages file extensions. More than one CAD package can be used with Mashoom, so if required you can select multiple packages! Of course, you can manually add any file extensions if you are using a different CAD provider.
It's not advisable to have duplicated extensions, it simply means Mashoom has to make an educated guess of what file type is being uploaded when it sees this duplicated extension. There is currently no way to manually override this, so it may lead to road-blocks.
Part Numbering (Quick Setup)

To learn how to how to setup a part numbering scheme in detail, for instance to fit in with a current part numbering method, read the part numbering tutorials.
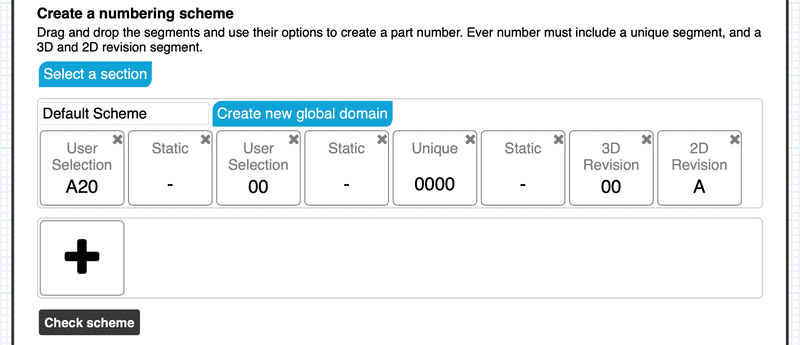
However, there is no harm in learning by trying! Follow these steps to setup a good standard scheme that will provide a good starting point for a new team.
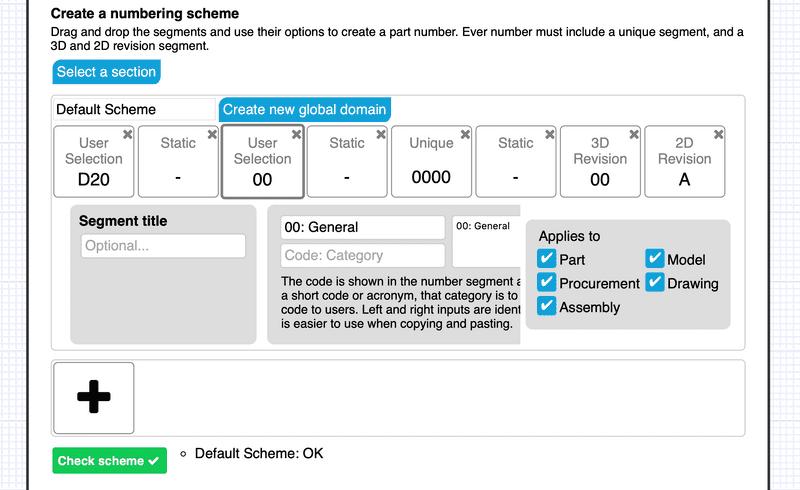
- Click the 3rd segment; the "User Selection" segment with "00"
- In the segment options, remove the row "01: Suspension" and change the first row to "00: General"
- Click the "Check scheme" button
Your scheme should now look like this:
